Keycloak setup and integration into Grails web application
Numerous modern web applications require some sort of access management in order to identify the users and deal with user sensitive data. This means that these applications have to take care of user authentication and authorization as well as ensure secure services. A solution can be developed independently for each web application, but that means we are reinventing the wheel over and over again while spending a lot of our effort and at the same time increasing expense. For that reason we decided to use out of the box solution with Keycloak and integrate it in our existing Grails web application.
Table of Contents
1. What is Keycloak?
Keycloak is an open source solution for identity and access management (IAM). It offers features such as:
- user authentication
- single sign on (SSO)
- social login
- centralized session management
- client adapters
When using Keycloak, we don't need to deal with login forms, authenticating users and storing users in our application. This especially comes in handy when we need a user to provide a form of authentication in order to control which content is available to which user. To learn more about Keycloak, check out the official documentation.
2. Keycloak server setup
In order to start using Keycloak, we first have to download (the newest version of) standalone server distribution of Keycloak from the official download page.
Then we open the terminal, unzip the downloaded Keycloak distribution, move to the unzipped folder and start Keycloak by running the following commands:
$ unzip keycloak-5.0.0.zip
$ cd keycloak-5.0.0/bin/
$ ./standalone.sh
If we don't want to run Keycloak on default port, we can set the offset like this:
$ ./standalone.sh -Djboss.socket.binding.port-offset=100
When the Keycloak has started, we should see the following two output lines:
INFO [org.jboss.as] (Controller Boot Thread) WFLYSRV0051: Admin console listening on http://127.0.0.1:10090
INFO [org.jboss.as] (Controller Boot Thread) WFLYSRV0025: Keycloak 5.0.0 (WildFly Core 7.0.0.Final) started in 15151ms
After the start up we open the browser and go to http://localhost:8080 or if we set the offset to http://localhost:8180. The first time we do that we will be redirected to the authentication login in order to create a new user.
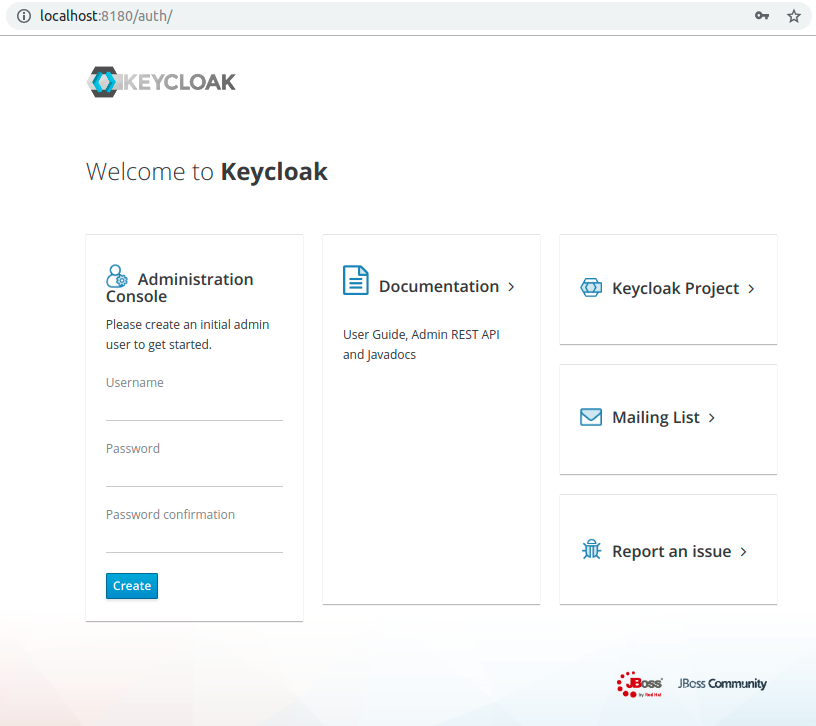
Type in a Username and Password of your choice and click on Create. When you're done, you should see a message User created.
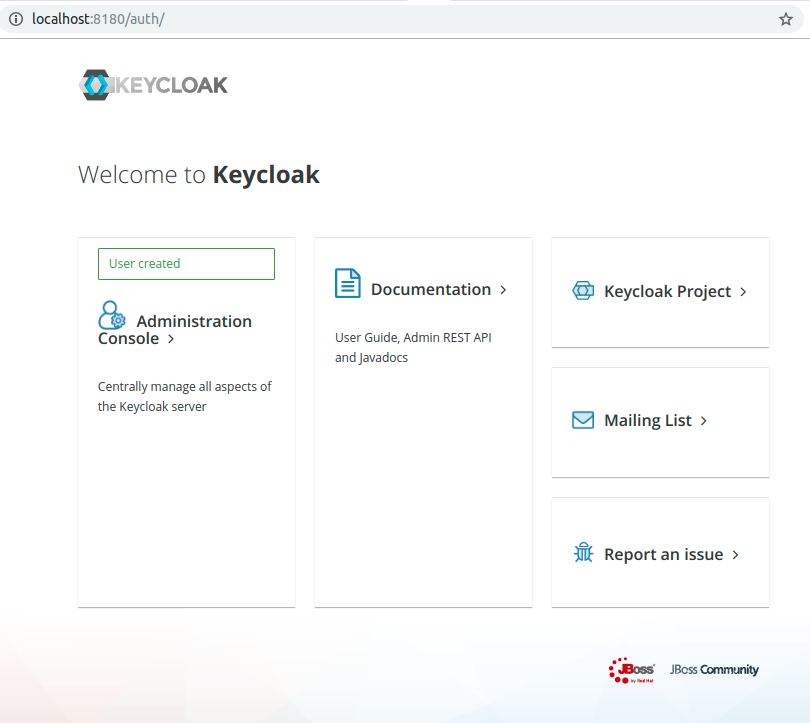
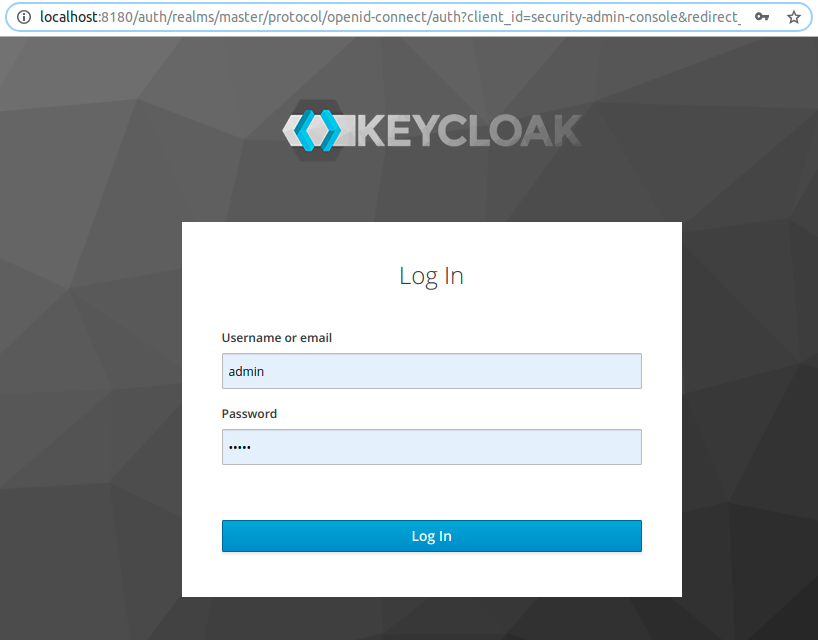
To log in, click on Administration Console, type in your username and password, and click Log in.
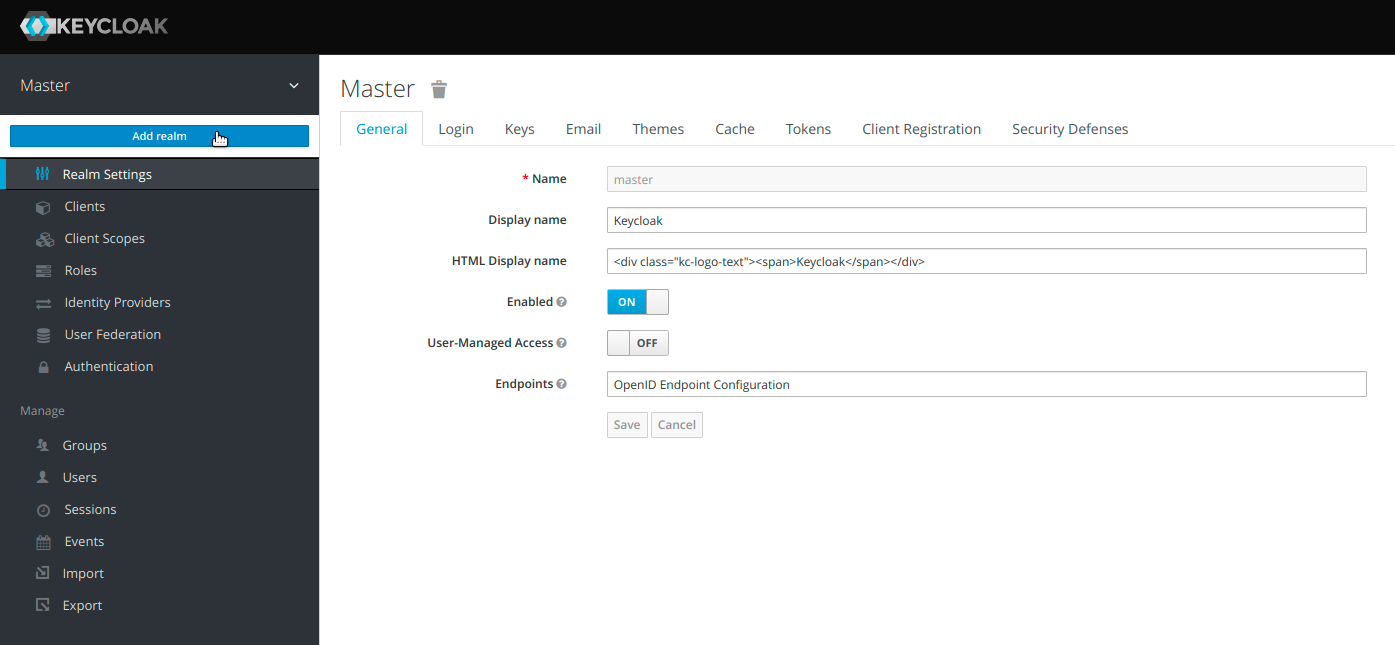
The initial page after logging in for the first time looks like this:

Category that is selected by default is called Realm Settings, and the name of the predefined Realm is Master. Realm represents a main area or a domain within which we will be operating with Keycloak. The master realm is the initial realm which allows admins to create, view and manage all the other realms created on this server instance. However, it is not recommended to use the master realm to manage the users and applications, therefore we are going to go through the process of creating a new realm.
3. Creating a realm
To create a new realm, move to the top left corner, where you have a dropdown arrow next to the name of the Master realm. On hover, you will see a new button appear. Click on Add realm.
After clicking on the button a new form will be displayed, where you have to add a name of your realm in the Name field and click on Create. If a realm you want to use already exists, you can also import it by clicking on Select file first, and then clicking on Create.

4. Securing application and services
In order to secure our application and services we are going to check out how to set up clients, roles, users and groups.
4.1. Clients
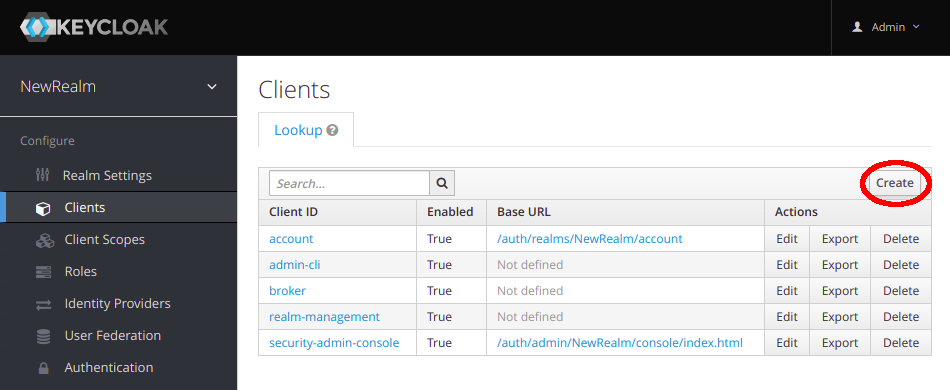
Clients are normally applications or services that use Keycloak. To create a client, choose Clients tab on the left hand side menu and then click on Create button on the right side.
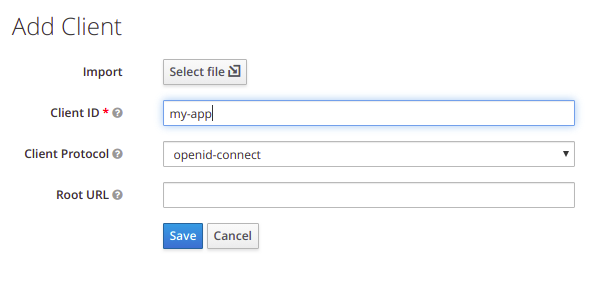
In the Add client form add Client ID, which is going to be referenced in URI and tokens to identify the client.
After you click on Save, a new client is created. In the settings view, the most important fields to be set are Root URL and Valid Redirect URIs. Root URL is the base URL of your application. Valid Redirect URIs represents a pattern a browser can redirect to after a successful login or logout. Confidential access type is used for server-side applications, while we use public access type for client-side applications.

4.2. Users
Users are entities with attributes that can login into the system and use services and features based on the roles and groups they are mapped with.
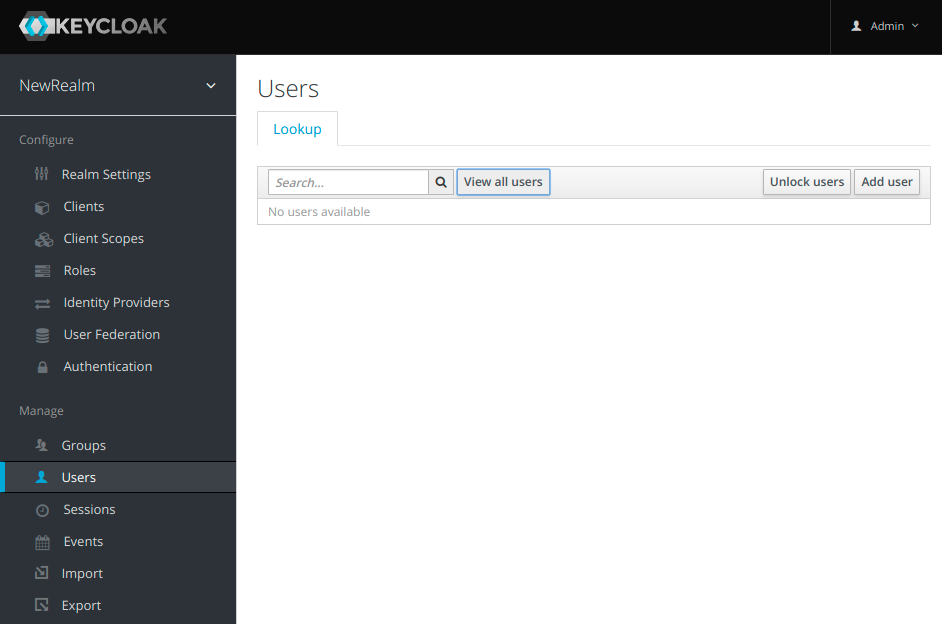
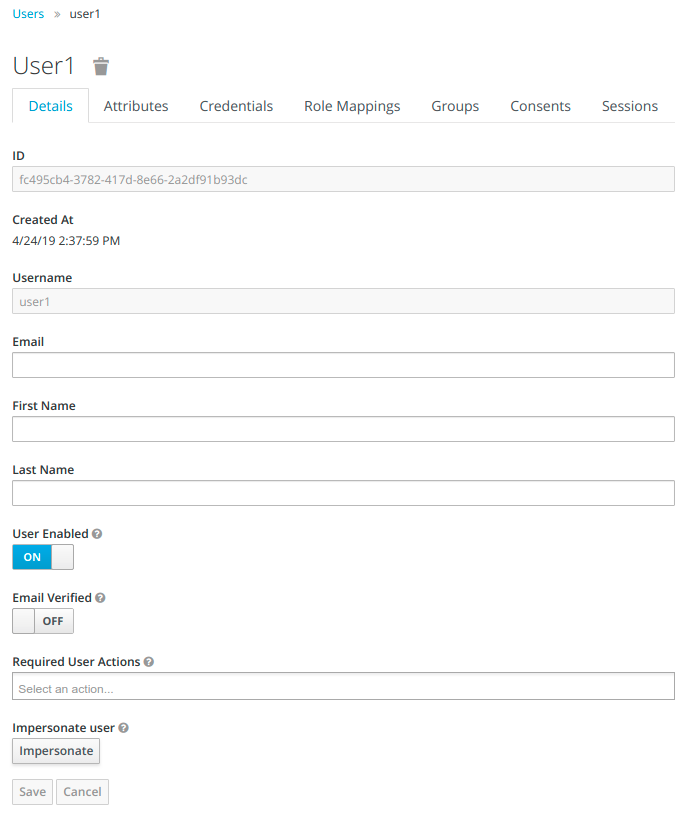
To create a new user, go to Users category in the left menu. Click on Add user.
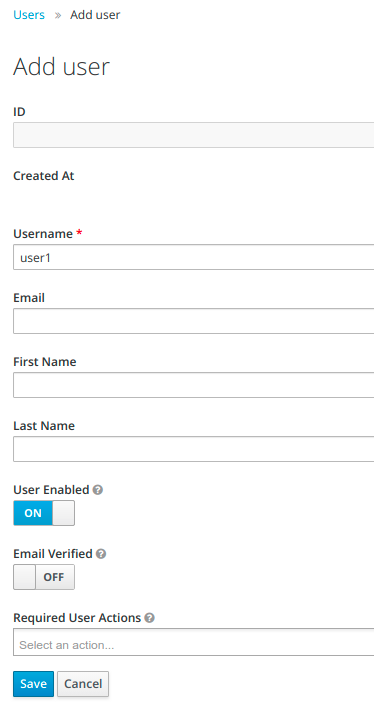
Fill out the Username field as well as any other fields that you find necessary to define a user of your application (eg. Email). Click on Save.
After you click on Save button your user will be created and the ID of the user will be automatically generated.
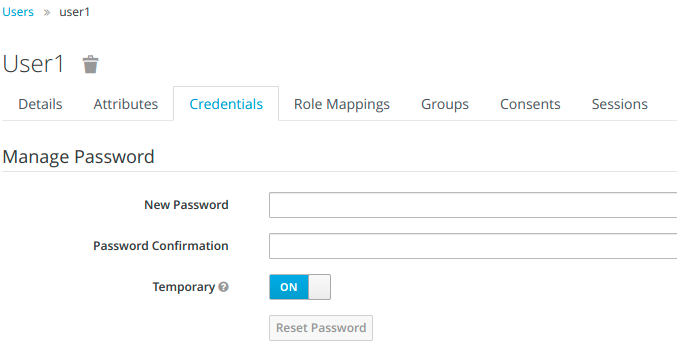
In order to change the user's credentials, go to Credentials tab and create a new password.
4.3. Roles
Roles define a type of user, while applications assign permission and access control to roles rather than individual users. Each user can be associated with multiple roles. We know two types of roles in Keycloak: realm roles and client roles. We can manage client specific roles for each individual client in the Roles tab, while we manage realm roles under Roles category in the left menu.

Client roles

Realm roles
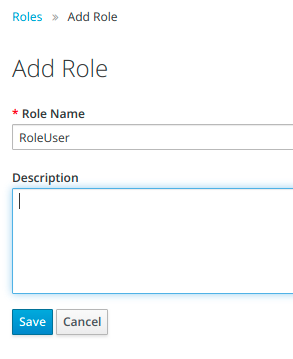
To add a new role we click on Add role button. We have to type in a Role Name and click Save.
4.4. Groups
Groups are a collection of users that enable you to map roles and manage attributes easily in one place. The main purpose of groups is managing users. Each user can be a member of multiple groups, inheriting the attributes and role mappings, which are assigned to each group.
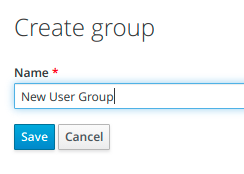
To add a new user group we go to Groups tab on the left menu and click on the button New.
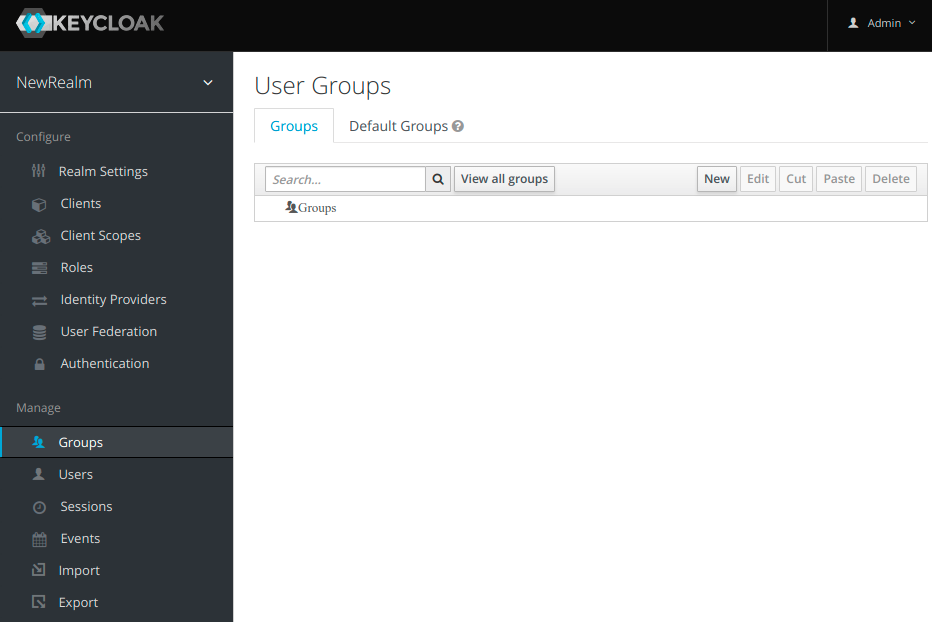
We type in a name of our user group and click Save.
4.5. Mapping groups, roles and users
We can assign roles to our groups so that all the users in our group will also inherit the roles of the group. We do this by going to Groups in the left side menu, opening the group we would like to assign a role to (in our case New User Group) and moving to Role Mappings tab where we can add RoleUser to Assigned Roles.

To add a user to a group we need to go to Users category in the left side menu, select Groups tab, then select New User Group we created earlier and click on button Join.
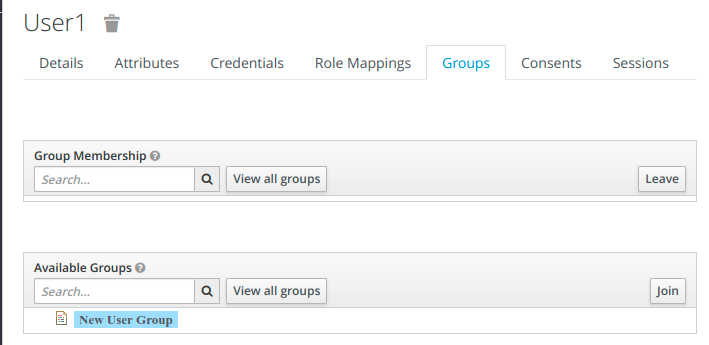
User1 should inherit the roles of the New User Group. We can check that by going to Role Mappings tab. Under effective roles we can see RoleUser.

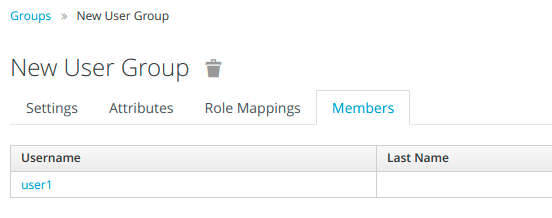
To check which users are members of our group, we can move to Groups in the left side menu and select Members tab.
5. Integration of Keycloak into Grails application
Keycloak is a separate server, to which our web applications point to. It secures these applications by using standards such as Open ID Connect and SAML 2.0. A user is redirected from the application to the Keycloak authentication server to enter their credentials. Application is then given a token, which contains identity information and permission data.
In order to have a Grails application running with Keycloak, we have to:
- Run Keycloak
- Integrate Keycloak into Grails application
- Run Graiils application
We already described how we start Keycloak on a desired port. Now we'll look into how to integrate Keycloak into the application.
5.1. Add Keycloak.json
Go to the Keycloak administration console. Select the client you created (we named it My-app) and go to the Installation tab. Select Format Option called Keycloak OIDC JSON and download (or copy) the json below.
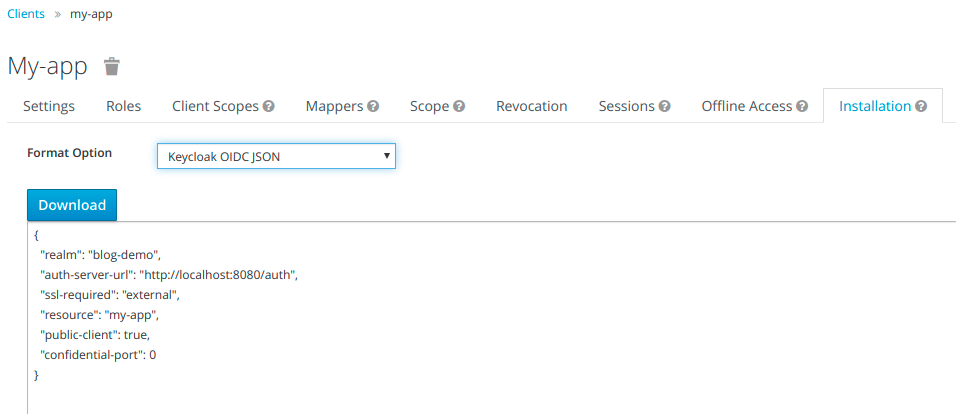
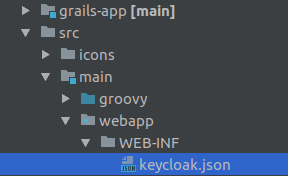
Save the generated file Keycloak.json into src/main/webapp/WEB-INF folder.
5.2. Configure dependencies
We used Gradle as our build automation tool. In order to run Keycloak, we added the following lines to our build.gradle file:
compile group: 'org.keycloak', name: 'keycloak-spring-security-adapter', version: '4.8.2.Final'
compile group: 'org.keycloak', name: 'keycloak-admin-client', version: '4.8.2.Final'
compile group: 'org.jboss.resteasy', name: 'resteasy-client', version: '3.6.3.Final'
compile group: 'org.jboss.resteasy', name: 'resteasy-jackson2-provider', version: '3.6.3.Final'
5.3. Edit Application.groovy and add security configuration file
In our grails-app/init/core folder we added SecurityConfiguration.groovy next to already existing Application.groovy.
First, we edited Application.groovy:
import grails.boot.GrailsApp
import grails.boot.config.GrailsAutoConfiguration
import org.keycloak.adapters.springsecurity.KeycloakSecurityComponents
import org.springframework.context.annotation.ComponentScan

@ComponentScan(basePackageClasses = [ KeycloakSecurityComponents.class, SecurityConfiguration.class])

class Application extends GrailsAutoConfiguration {
    static void main(String[] args) {
        GrailsApp.run(Application, args)
    }
}
Then we added SecurityConfiguration.groovy:
import org.keycloak.adapters.springsecurity.client.KeycloakClientRequestFactory
import org.keycloak.adapters.springsecurity.client.KeycloakRestTemplate
import org.keycloak.adapters.springsecurity.config.KeycloakWebSecurityConfigurerAdapter
import org.springframework.beans.factory.annotation.Autowired
import org.springframework.beans.factory.config.ConfigurableBeanFactory
import org.springframework.boot.web.servlet.ServletListenerRegistrationBean
import org.springframework.context.annotation.Bean
import org.springframework.context.annotation.Configuration
import org.springframework.context.annotation.Scope
import org.springframework.http.HttpMethod
import org.springframework.security.config.annotation.authentication.builders.AuthenticationManagerBuilder
import org.springframework.security.config.annotation.method.configuration.EnableGlobalMethodSecurity
import org.springframework.security.config.annotation.web.builders.HttpSecurity
import org.springframework.security.config.annotation.web.configuration.EnableWebSecurity
import org.springframework.security.config.http.SessionCreationPolicy
import org.springframework.security.core.session.SessionRegistryImpl
import org.springframework.security.web.authentication.session.RegisterSessionAuthenticationStrategy
import org.springframework.security.web.authentication.session.SessionAuthenticationStrategy
import org.springframework.security.web.session.HttpSessionEventPublisher
import org.springframework.security.web.session.SessionManagementFilter

import javax.servlet.*
import javax.servlet.http.HttpServletRequest
import javax.servlet.http.HttpServletResponse

@Configuration
@EnableWebSecurity
@EnableGlobalMethodSecurity(prePostEnabled = true)
class SecurityConfiguration extends KeycloakWebSecurityConfigurerAdapter {

    @Autowired
    public void configureGlobal(AuthenticationManagerBuilder auth) throws Exception {
        auth.authenticationProvider(keycloakAuthenticationProvider())
    }

    @Bean
    @Override
    protected SessionAuthenticationStrategy sessionAuthenticationStrategy() {
        new RegisterSessionAuthenticationStrategy(new SessionRegistryImpl())
    }

    @Bean
    public ServletListenerRegistrationBean<HttpSessionEventPublisher> getHttpSessionEventPublisher() {
        new ServletListenerRegistrationBean<HttpSessionEventPublisher>(new HttpSessionEventPublisher())
    }

    @Override
    protected void configure(HttpSecurity http) throws Exception {
        super.configure http
        http
                .headers().frameOptions().sameOrigin().disable()
                .addFilterBefore(corsFilter(), SessionManagementFilter.class)
                .csrf().disable()
                .sessionManagement().sessionCreationPolicy(SessionCreationPolicy.STATELESS)
                .sessionAuthenticationStrategy(sessionAuthenticationStrategy())
                .and()
                .authorizeRequests()
                .antMatchers("/assets/*").permitAll()
                .antMatchers("/auth/*").permitAll()
                .antMatchers("/error/*").permitAll()
                .antMatchers(HttpMethod.OPTIONS, "/**").permitAll()
                .anyRequest().hasAnyAuthority("RoleUser")
    }

    Filter corsFilter() {
        return new Filter() {
            @Override
            public void doFilter(ServletRequest servletRequest, ServletResponse servletResponse,
                                 FilterChain filterChain) throws IOException, ServletException {

                HttpServletResponse response = (HttpServletResponse) servletResponse
                HttpServletRequest request = (HttpServletRequest) servletRequest

                response.setHeader("Access-Control-Allow-Origin", request.getHeader("Origin"))
                response.setHeader("Access-Control-Allow-Methods", request.getHeader("Access-Control-Request-Method"))
                response.setHeader("Access-Control-Allow-Headers", request.getHeader("Access-Control-Request-Headers"))
                response.setHeader("Access-Control-Allow-Credentials", "true")
                response.setHeader("Access-Control-Max-Age", "180")

                filterChain.doFilter(servletRequest, servletResponse)
            }

            @Override
            public void init(FilterConfig filterConfig) throws ServletException {

            }

            @Override
            public void destroy() {
            }
        }
    }

    @Autowired
    public KeycloakClientRequestFactory keycloakClientRequestFactory

    @Bean
    @Scope(ConfigurableBeanFactory.SCOPE_PROTOTYPE)
    public KeycloakRestTemplate keycloakRestTemplate() {
        return new KeycloakRestTemplate(keycloakClientRequestFactory)
    }
}
Finally, we have to start our Grails application. You can read more about configuring and running Grails application in the article Launch configuration for Grails project with Gradle.
When the application starts, we are redirected to Keycloak login and prompted for our credentials before we're able to see the content of the application.
6. Conclusion
In this article we learned about basic set up of Keycloak, and how to integrate it into an existing Grails web application. We covered basic Keycloak functions in order to secure our applications and services with this simple yet powerful out of the box solution and adapted our existing code to work with Keycloak.


